
I have a love/hate relationship with Pinterest.
I love/hate finding good things that waste my time because I'm already soooo good at wasting my own time. I also love/hate finding so many good things that I get overwhelmed thinking about the awesome potential of it all. And then I do...nothing.
See... that's why I love/hate Pinterest, and that's why I resisted joining up for so long. So I'm determined to only (mostly) pin things that I will actually (might actually in the future) do. And today I'm celebrating something I actually did! Yea ME!
THE COLLAGE WALL
I'm a photo addict. I love taking pictures and having pictures taken. I like displaying them, and fortunately in our new house we have HUGE walls and TONS of wall space. So I decided to do a collage wall.
Now note, I had done a collage wall in our old house, and I liked how it turned out, but I didn't love it. It never quite looked right. So I went to Pinterest and looked for some help in this area. I found this...

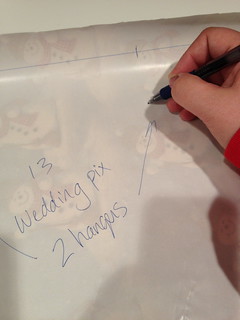
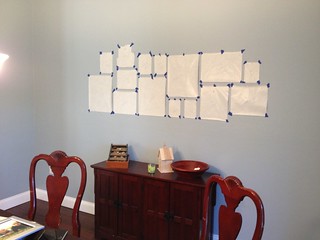
I found all of the pictures in the boxes that we had that had silver frames and collected them all together. There were 15. I traced them all out on an old roll of wrapping paper.
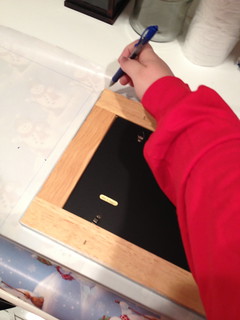
I also labeled what picture I had traced, and I marked where the hangers were on the frame...you'll see why in a minute.
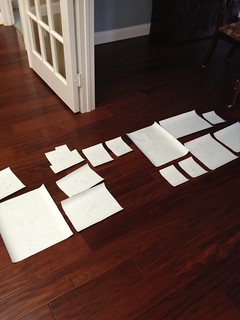
And then I cut them all out. It was tedious, and I wondered if it was worth the hard work...but I pressed on. I initially arranged all of the paper cut outs on the floor. It was a little easier for me to move them around and play with them like puzzle pieces.
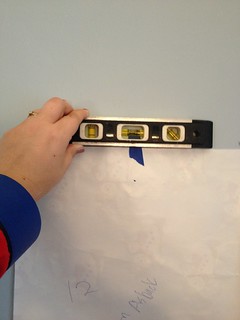
Then I used my handy blue painters tape and bullet level and started taping them to the walls.
I kept putting up my little squares on the wall until I had this
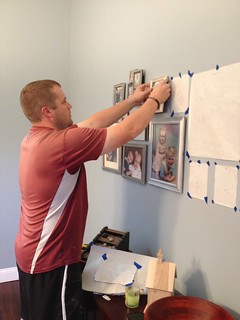
Then I had my Main Squeeze come in and start drilling screws and hanging pictures. I totally could have done this myself, but he's so good at it, and it went very fast. It would have taken me 2 or 3 times as long. Remember where I marked the hangers on the paper? He just put the screw in the wall through the paper, then ripped the paper off the wall. We did a little measuring and leveling at this point just to make sure it looked the way we wanted it to.
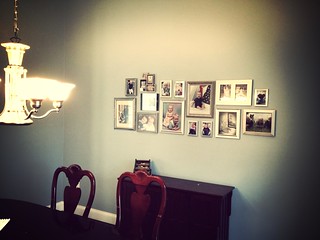
When we finished, it looked like this....
A couple lessons from this project...
*If you're a perfectionist, this project will drive you crazy. It's hard to take a 3D object like a frame and transfer it to a 2D piece of paper then cut it out perfectly and hang it level. If you look closely, my results are not perfect, but I think they're pretty great!
*Frames with table top stands are hard to hang on a flat wall. Your frame will not sit flat on the wall and will not look level. We destroyed several stands by ripping them off the back of the frame in this project. That was fun!
*Command strips by 3M are one of my favorite products. We had frames that just didn't want to hang right with the screws and hangers, so we'd cut a command strip and put it on the corner and it would help it stay.
*If you have old frames that aren't all the same color, use silver craft paint to make them all the same color. It saved me a ton of money.
*It does take a lot of time to trace, cut out, lay out and hang all the paper cut outs. But when it comes to the actual hanging, the time flies by. This day, my main squeeze and I had hung 29 pictures. Most of them by using this method. Once I got all the paper cut outs taped up, it took him an hour to hang the 29 pictures. Boosh.
Have you ever tried doing something like this? How did it turn out? Do you love or hate the process of hanging pictures?