
1) Open iPhoto
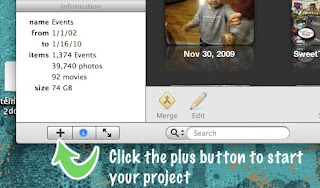
2) Click the plus sign in the lower left corner to start your project
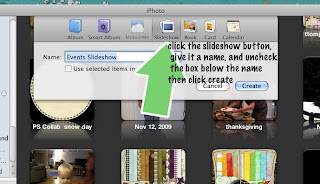
3) A menu will pop up. Click "slideshow". Name the project. I uncheck the box under the name (unless I have already selected some of the pictures that i want in my slideshow - then I leave it checked). Then click "Create"
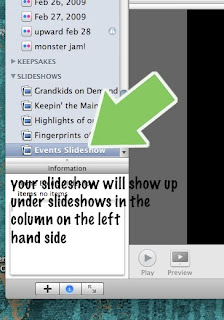
4) At this point your slideshow project will be in the left hand column under slideshows. You've gotta know where this is for the next step. It won't be called "events slideshow" - it will be called whatever you named it. If it's highlighted (like it is in my screenshot), you'll have a big black box in the main window...don't freak out!
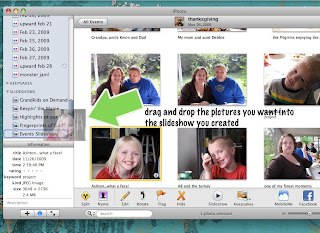
5) Click on Events in the left hand column and find the photos for your project. Now drag and drop the photos you want from the events you've opened in the main window onto the name of your slideshow in the left hand column (remember from step 4?) You can drag individual photos, multiple photos (by holding down the CMD key on the keyboard and clicking on photos) or an entire event.
6) When you double click on the name of your slideshow, you'll see all the photo thumbnails across the top of the page. Drag and drop the photo thumbnails across the top of your slideshow to put the photos in the order that works for you.

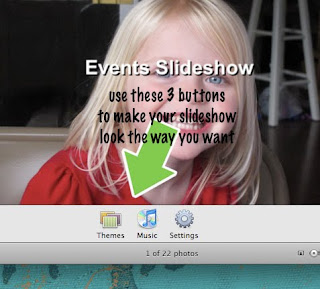
7) Click on the "themes," "music," and "settings" buttons to make your show look the way you want it to. You may have to click an "apply" button to make the changes stick. iPhoto automatically saves your settings, so that even if you quit iPhoto, your slideshow settings will be saved the next time you open iPhoto.
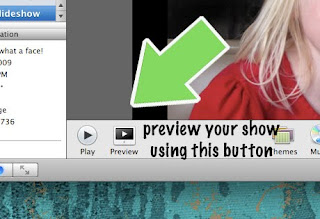
8) Click the preview button to see what your slideshow looks like in the main iPhoto window. Clicking the play button makes it show up fullscreen. Pressing the "esc" button on your keyboard stops the playback.
9) Once you have your slideshow just the way you want it, you can keep it right where you have it, and just show it in iPhoto from your computer. Or you can share it by exporting it. Click the "export" button, and this dialog box will pop up....
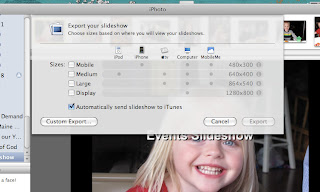
You need to choose what size you want to save it on your hard drive. You need to think about what you want to do with it next. I knew I was going to burn it on a DVD to show on a TV so I did display (large would have worked too), but if you're only going to put it on youtube or your iPod, you can choose something smaller. Choose your size, click export, choose where you want to save it on your computer and what you want to name it, and you're done! The exporting process does take a few minutes as iPhoto renders the still pictures into a movie format...again...don't freak out. The more photos, the longer this will take. You should be able to watch your photos move along as it renders. Most of the time, I try to load or unload the dishwasher before the exporting is done. :o)
In my next post, I'll go thru how to take your slide show off your computer and onto a DVD to give as a gift!
Here's my finished slideshow. Let me know what you think!


No comments:
Post a Comment