Monday, January 17, 2011

How to make a Fotobook - another fun and easy way to share Facebook pix

***UPDATE*** I just got a message in Facebook saying that the last day to use the Fotobook app is February 1. They are going to re-group and go onto the next adventure. Sad......I really enjoyed using this app.

I don't know about you, but I upload a TON of pictures to Facebook. It's easy to share what we're doing with our friends and family without having to clog up email boxes or getting prints made and mailed. But sometimes it's just nice to hold pictures in your hand....without having to spend an arm and a leg.
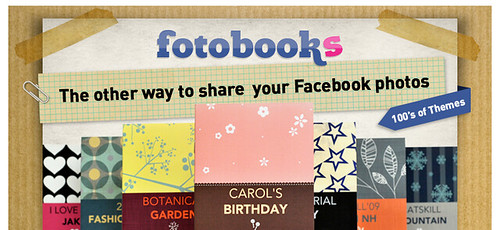
Enter FOTOBOOKS.

Fotobooks is an application within Facebook. You can make a 19 page, 5x7 book with trendy graphics and color schemes, using the photos you or your friends have already uploaded to Facebook. Fotobooks boasts on its homepage you can make a book in less than 5 minutes. Although I've never completed a book in 5 minutes, I have completed them in less than an hour, even doing all the modifications I'm going to show you below.

The best part is that it costs $5.99 - SHIPPED

It's perfect for creating a little memory book of a specific event or the favorite people in your life. For Christmas this year I made Fotobooks for each of my kids about our trip to Disney to put in their stockings. They loved them!!!

IMAG0134

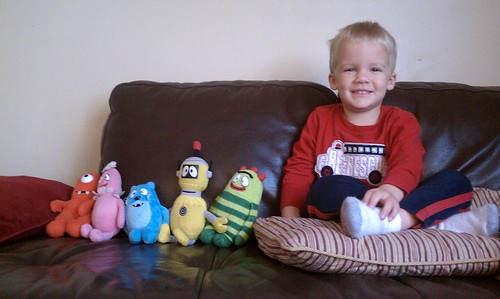
#1 was at school, so we sometimes pretend that Big Brobee is him. If you don't know who Brobee is, you don't watch Yo Gabba Gabba. And if you don't watch Yo Gabba Gabba, you really haven't lived....really.

Ok, back to Fotobooks. Log into your Facebook account, and search Fotobooks. You'll see a few choices, but the first two should be a "products/service" page, and the other should be an "app" page. When you click on the "app" page it will look like this.

Picture 6

It may ask you to "like" a page. Do it. I promise you'll like it. It may ask you to allow the application access to your personal info and your friends personal info. Allow it. You won't regret it. I have never gotten any spam, viruses, unwanted emails, etc from them. In fact, I'll tell you what they use you and your friend's personal information for in a minute.

You'll see a big pink button that says "get started." Click it!
Then you'll see another big pink button that says "create a new book." Click that!

Then you get to design your cover....

Picture 7

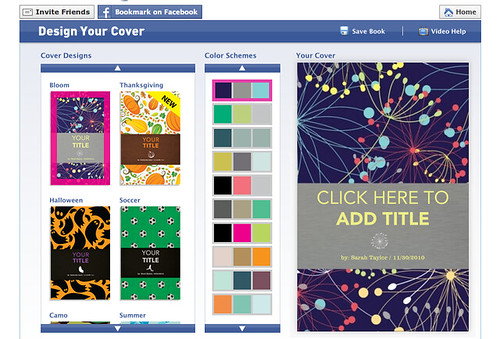
There are 25 cover options to choose from, and each cover option can be changed into different color schemes. When you click on a cover design thumbnail on the left, it shows up big in the window on the right.

colorchange

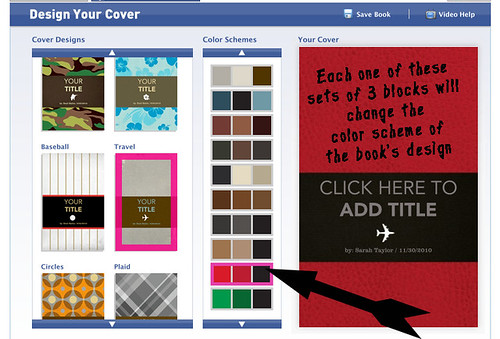
Each design has its own sets of color schemes to choose from. You can click on each color scheme, and your design preview in the right hand side will change.

Picture 9

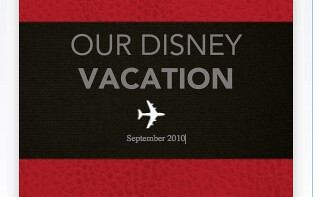
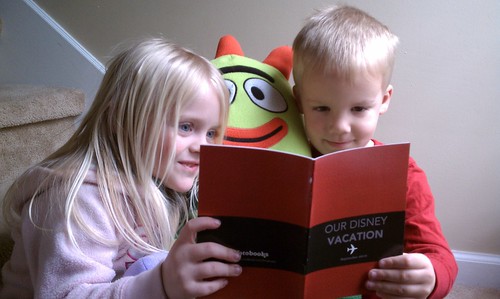
Click the title to type in the title for your book. "Our Disney Vacation" not too original, but accurate. You can also change the by-line. The standard one says "created by your name on date" Most of the time, I change that too. Just type. Then click Continue when you're done.

Here's where it can get confusing, but you're smart. You'll figure it out.

Picture 12

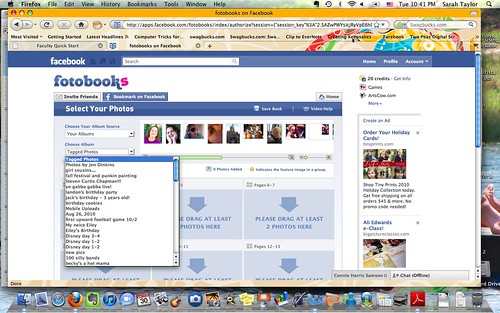
Across the top you'll see thumbnails of your Facebook profile pictures and 2 drop down menus. At the bottom you'll see blue boxes that say "drag at least 2 pictures here." The blue boxes represent 2 pages of your book. Using the drop down menus, you'll put thumbnails of the pictures you want in your album across the top, and then you'll drag the thumbnail picture from the top down to the page you want the picture to appear on. Am I going too fast? Ok, I'll slow down a little....

When this screen shows up, it defaults to your albums as your album source, and tagged photos as the album you choose from, and across the top will be pictures that you are tagged in....probably not what you want in your photobook.

Picture 10

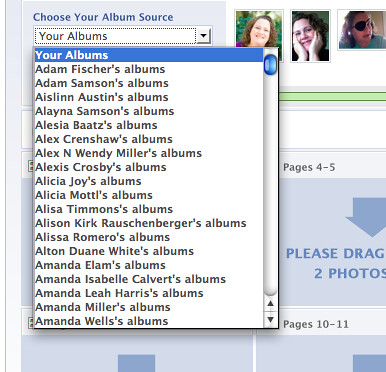
When you click on the drop down menu under album source you will see all your friends. This is one way Fotobooks uses your personal information (and your friends - Fotobooks accesses their albums). You can also use your friend's Facebook pictures to make an album!!! Can you imagine the possibilities here!!! You can make a little brag book album for your sister/friend/co-worker who just had a baby, and has posted half a million pics of their baby on Facebook but can't get to CVS to get any of them printed out to put on her desk at work!!

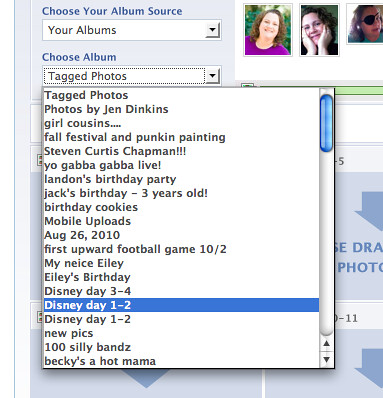
Ok, so after you pick whose pictures you are going to use, you pick which album you are going to get pictures from. Back to my project - the Disney vacation album - I chose one of my Disney facebook albums.

Picture 14

Next, drag the pictures you want from the thumbnail line down to the blue boxes. Each box represents a double page spread. You must have 2 pictures per box. (so you must have 38 pictures in the whole album - yes, you can repeat pictures on different pages)

dragging images

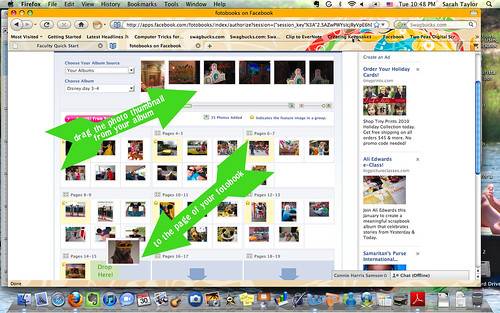
Whichever photo is next to the star will be the prominent photo on the page (normally the biggest, or the biggest frame around it), so arrange your photos in the little boxes appropriately.

Picture 16

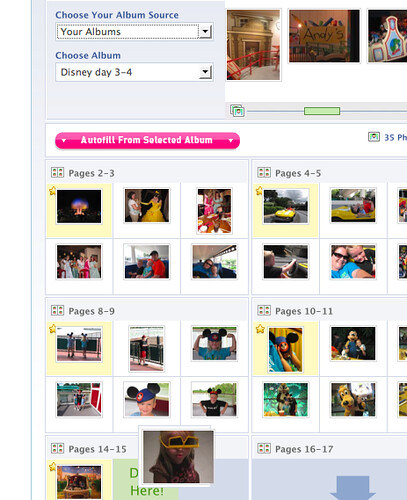
Once all your pages have at least 2 pictures, click the big pink continue button, and you'll see previews of each page.

Picture 17

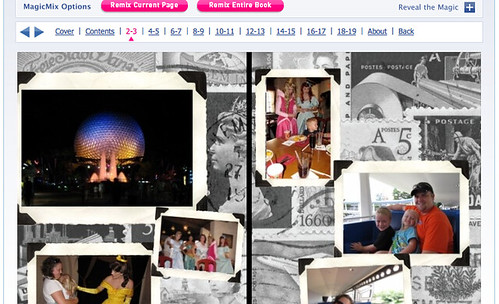
I think this page is way too busy with the black and white background, so I clicked the pink "remix this page button" until I like what I see. That's the easy way, but I'm a control freak, sometimes. Any other control freaks out there??? If so, this button's for you....
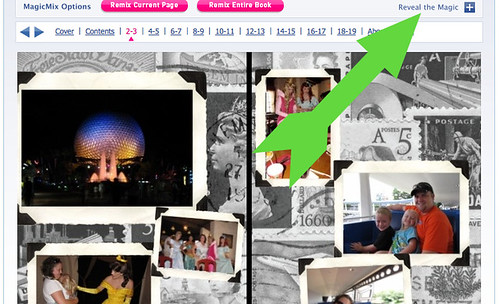
revealthemagic

REVEAL THE MAGIC!!!
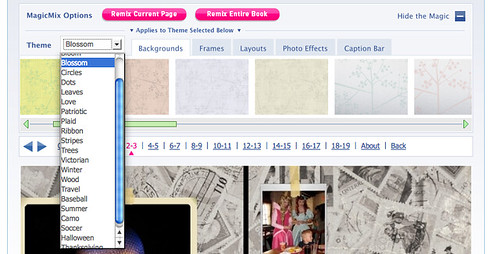
Each tab and drop down menu provides options for backgrounds, frames, photo effects, layouts, etc. Just keep clicking until it looks the way you want! If you want to save along the way, there's a save button at the top.

Picture 19

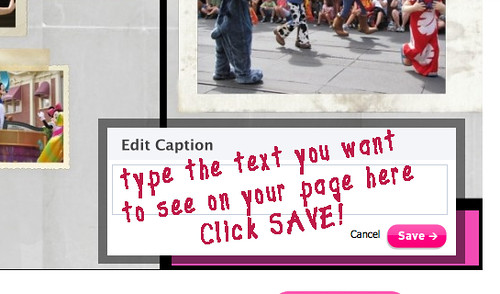
Now for captions...You can make them disappear, or you can fill them in. It's as easy as typing. Click on the caption bar, type in your caption, click save!

caption

Please, for the sake of your own happiness, please make sure you preview all your pages one more time before you click the "order this Fotobook" button. The ordering process is pretty straightforward. You can use credit cards or paypal, and it ships to you super quick! I hope you'll give it a try!

Fotobooks has been doing a promotion that they'll send a copy of your Fotobook to 3 friends free. The way it works is that you pick friends in Facebook, and it sends them an email (another use of you and your friend's personal info). They have to accept the invite and allow access to their personal stuff by Fotobooks in order to get their book. If they are in the habit of not allowing access by Facebook applications, they won't get their book. I've never, ever, had a problem ever with Fotobooks abusing the information they have access to. That's how it works!

Have you used Fotobooks? What was your experience like? Can you think of a way you could use Fotobooks? Feel free to post links to albums you've made.

Here's the link to my finished Disney album

Friday, January 14, 2011

Finding Delight in Everyday Life - Friday Edition


IMAG0137, originally uploaded by sarahscrappin.

My word for the year is delight. Today, this photo brings me delight.

It's my Main Squeeze paying bills....

Last year this view would have caused my insides to cringe, because it meant that I had to be accountable for how I spent our money. Sometimes it was ok, and sometimes I surprised my Main Squeeze. He doesn't like surprises. We live our life frugally and sometimes life is tight, but God always provides for us. We have to work at communicating in this area, and we've had to grow.

Today, I chose to delight in this. This is my husband taking care of his family. He was watching Human Target on Hulu. He likes multi tasking. He's got earplugs in because I'm working at my computer next to him, and I can't listen to a show and concentrate at the same time. This is us being together and working side by side. Even when we had our "post bills this is the bottom line" discussion, it wasn't painful. It was more delightful....

Wednesday, January 12, 2011

Today I am....

It's no secret I'm a fan of Katie the Scrapbook Lady....Today she made a post called "Today I am..." I'm stealing it. Katie should consider it a compliment.


Today I am going to finish my Kindermusik mail out. I've dragged it out too long.

Today I am going to get some of my grading done. I don't want to drag it out the rest of the week.

Today I am going to get the last bit of laundry done (and maybe even folded), so it doesn't drag out for the rest of the week! (do we sense a theme here?)

Today I am going to play with this kid some....

IMAG0135

How can I resist a kid that asks me to take his picture with his favorite bed buddies?

Today I am going to make sure I read my Bible before #2 gets home from school, because when I don't, well, it doesn't always happen....

Today I'm going to try to keep my cool with the kids as I try to help them to get their homework done, chores done, dinner eaten, and verses reviewed before going to church tonight. I really hate getting grumpy on Wednesday afternoons because I don't enjoy church as much, and I really like Wednesday night church. I'm going to try to find delight in this task.

Today I'm going to probably drink too much coffee...it's really cold.

Sunday, January 2, 2011

Etched Candle Tutorial

I made the easiest craft project over Christmas break for some of our friends - you know...the friends you want to get something for, but if you actually went out shopping for all of them, you really would lose your mind trying to pick out something they'd like without burning your bank account. Normally, I make cookies or candies, but I didn't want to bake this year...weird....so I etched candles. Yeah. I headed over to Walmart and bought sets of 5 jarred candles in bright red. The darker the background, the better the etching shows up.

IMG_6279


Then I got out some old letter stickers from my paper scrapping stash. I lined them up to spell out the word NOEL. Make sure you look for air bubbles between the candle wax and the glass. Don't put your stickers there. It won't show up as well.

IMG_6280

Next, I added some star stickers. What I'm doing here with the stickers is masking off places where the glass will stay glass looking, and not etched, so your stickers need to have the shape you're looking for.

IMG_6281

Then get your good ol' blue masking tape, and cover the top and bottom of your candle. You gotta be a little OCD with this step about making sure the line is straight and level. You're creating the top and bottom lines for the band of etching across the middle of the candle.

IMG_6282

Ok, before making the etching magic, you need to take a popsicle stick or your fingernail, and rub down all your letter stickers and tape. If there are any bubbles or edges that aren't sealed down tight, the etching goo will get behind your sticker mask, and you won't have a crisp image.

Now for the magic goo....

IMG_6283

I got it at Michaels. It's thick and gooey and gritty and fabulous. I used an old bristle brush I had on hand to apply it. The instructions say to wear gloves when applying, but I live dangerously....

IMG_6284

To apply, just glob it on. And when I say glob it, I mean glob it. There's no such thing as pretty brush strokes here. It needs to be pretty thick. Cover up all your stickers and the edges of your tape.

IMG_6285

See what I mean by thick? When its all covered, let it sit. The directions say no longer than 30 seconds, but I don't think it really matters that much. I left one for 45 minutes, and it didn't look any more etched than ones I left sitting for just a minute or 2.

IMG_6286

Then, take it to a sink and wash off the magic goo.

IMG_6287

Peel off the stickers and tape too. When I first washed off the goo, I thought to myself "This is the biggest crock of bull!! It didn't do anything!!" You can't see it when it's wet!! Take a towel - paper or otherwise - and dry that baby off, and voila...

IMG_6293

Beautiful etched candle!!!

Saturday, January 1, 2011

Delight

Happy new years everyone! It's been fun the past few days looking at everyone's memories of the past year, their holiday recaps, reverb10 posts, "my year in Facebook status" collages. I also get a kick out of reading resolutions- from the serious and complex to the mundane and vague. There have been 2 years that I've kept my resolutions. One of them is a little too personal to put out in the blogosphere, but the other was that one year I wanted to read more, so I resolved to read 1 book a month for the entire year. They couldn't be "fluff" books either. I kept a book by the bed and another on the back of the potty, and I did it. If you come to my house today, you'll still see a book on the windowsill in my bathroom for that specific reason. I know...TMI.

So, do I have a resolution for this year? Yeah. I want to take delight in what I do. After thinking, and talking to my main squeeze, and doing all that writing for reverb10 (which was so fun!), I realized that I have a full, blessed life, but I constantly go around looking for the proverbial "easy button." Everything feels like a chore. Even the moments that are lighthearted are short lived. This is probably a dramatic overstatement, but more often than not, I feel frustrated. Frustration begets frustration. But changing mu attitude to one of delight will bring more delight.

There are some things I need to do along the way for delight to take over, and you'll hear about them along the way, but for now, DELIGHT is the one little word that embodies the resolutions I'll be making this year.

- Posted using BlogPress from my iPad

December 25 – Photo – a present to yourself

Sift through all the photos of you from the past year. Choose one that best captures you; either who you are, or who you strive to be. Find the shot of you that is worth a thousand words. Share the image, who shot it, where, and what it best reveals about you.


Most of the time, I'm behind the camera....There aren't a huge number of pictures of me. Most of the time, it doesn't bother me that much. I've tried to hand the camera off to my main squeeze or another family member so I'm not absent in our family's photos, but they aren't as careful as I am to make sure I look good in my pictures! How dare they!!!! Anyone else know what I'm talking about?? Just kidding....

My friend Jen - the talent behind J Dinkins Photography - took my favorite photo this year.

She took our family's photos this fall. They turned out amazing. We went to Alpine Groves Park. It was freezing - the first really cold day of the season. Jen was so easy going and relaxed, it made our family that way too. I remember the night before, I told the kids we were going to have our pictures taken, and that pictures were Mommy's favorite, and that they needed to do their best and not be "shy" or rude, and then we practiced posing a smiling. Each kid took turns pretending to be the photographer, and they put us in whatever pose they wanted, and everyone smiled. I don't know if it was the practicing the night before or what, but they all cooperated beautifully.

I love this picture because it's not posed. It's what our family is like. We wanted a picture of the girls and #2 was FREEZING!! She couldn't smile straight because she was so cold. I leaned over to grab her, and she started laughing, and Jen snapped the picture.

If you want to see more of Jen's wonderful photography, check out her Facebook page...HERE

Related Posts with Thumbnails

Swidget 1.0